
DIY: pretty envelope liners
For my wedding invitations, I was obsessed with the idea of creating pretty paper envelope liners. 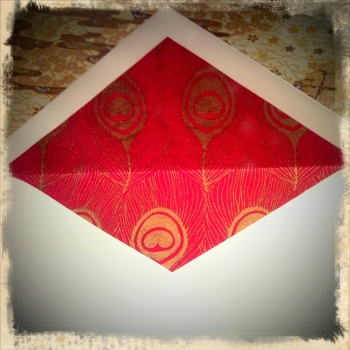 I loved my vintage letterpress wedding invites, but I wanted to add a personal touch of color and creativity. If you’re on a budget and want to make your special occasion invites stand out and look magical, this is a great, cost effective way of adding something totally handmade and unique! It was so much fun for me to take the time and do this myself- working on a paper crafts project made me feel like i was back in art class at school- meditating while my hands were working, and giving myself a break from my laptop. I want to do arts & crafts projects like this more often! I’m planning to reuse the paper scraps for DIY bookmarks, so stay tuned for that.
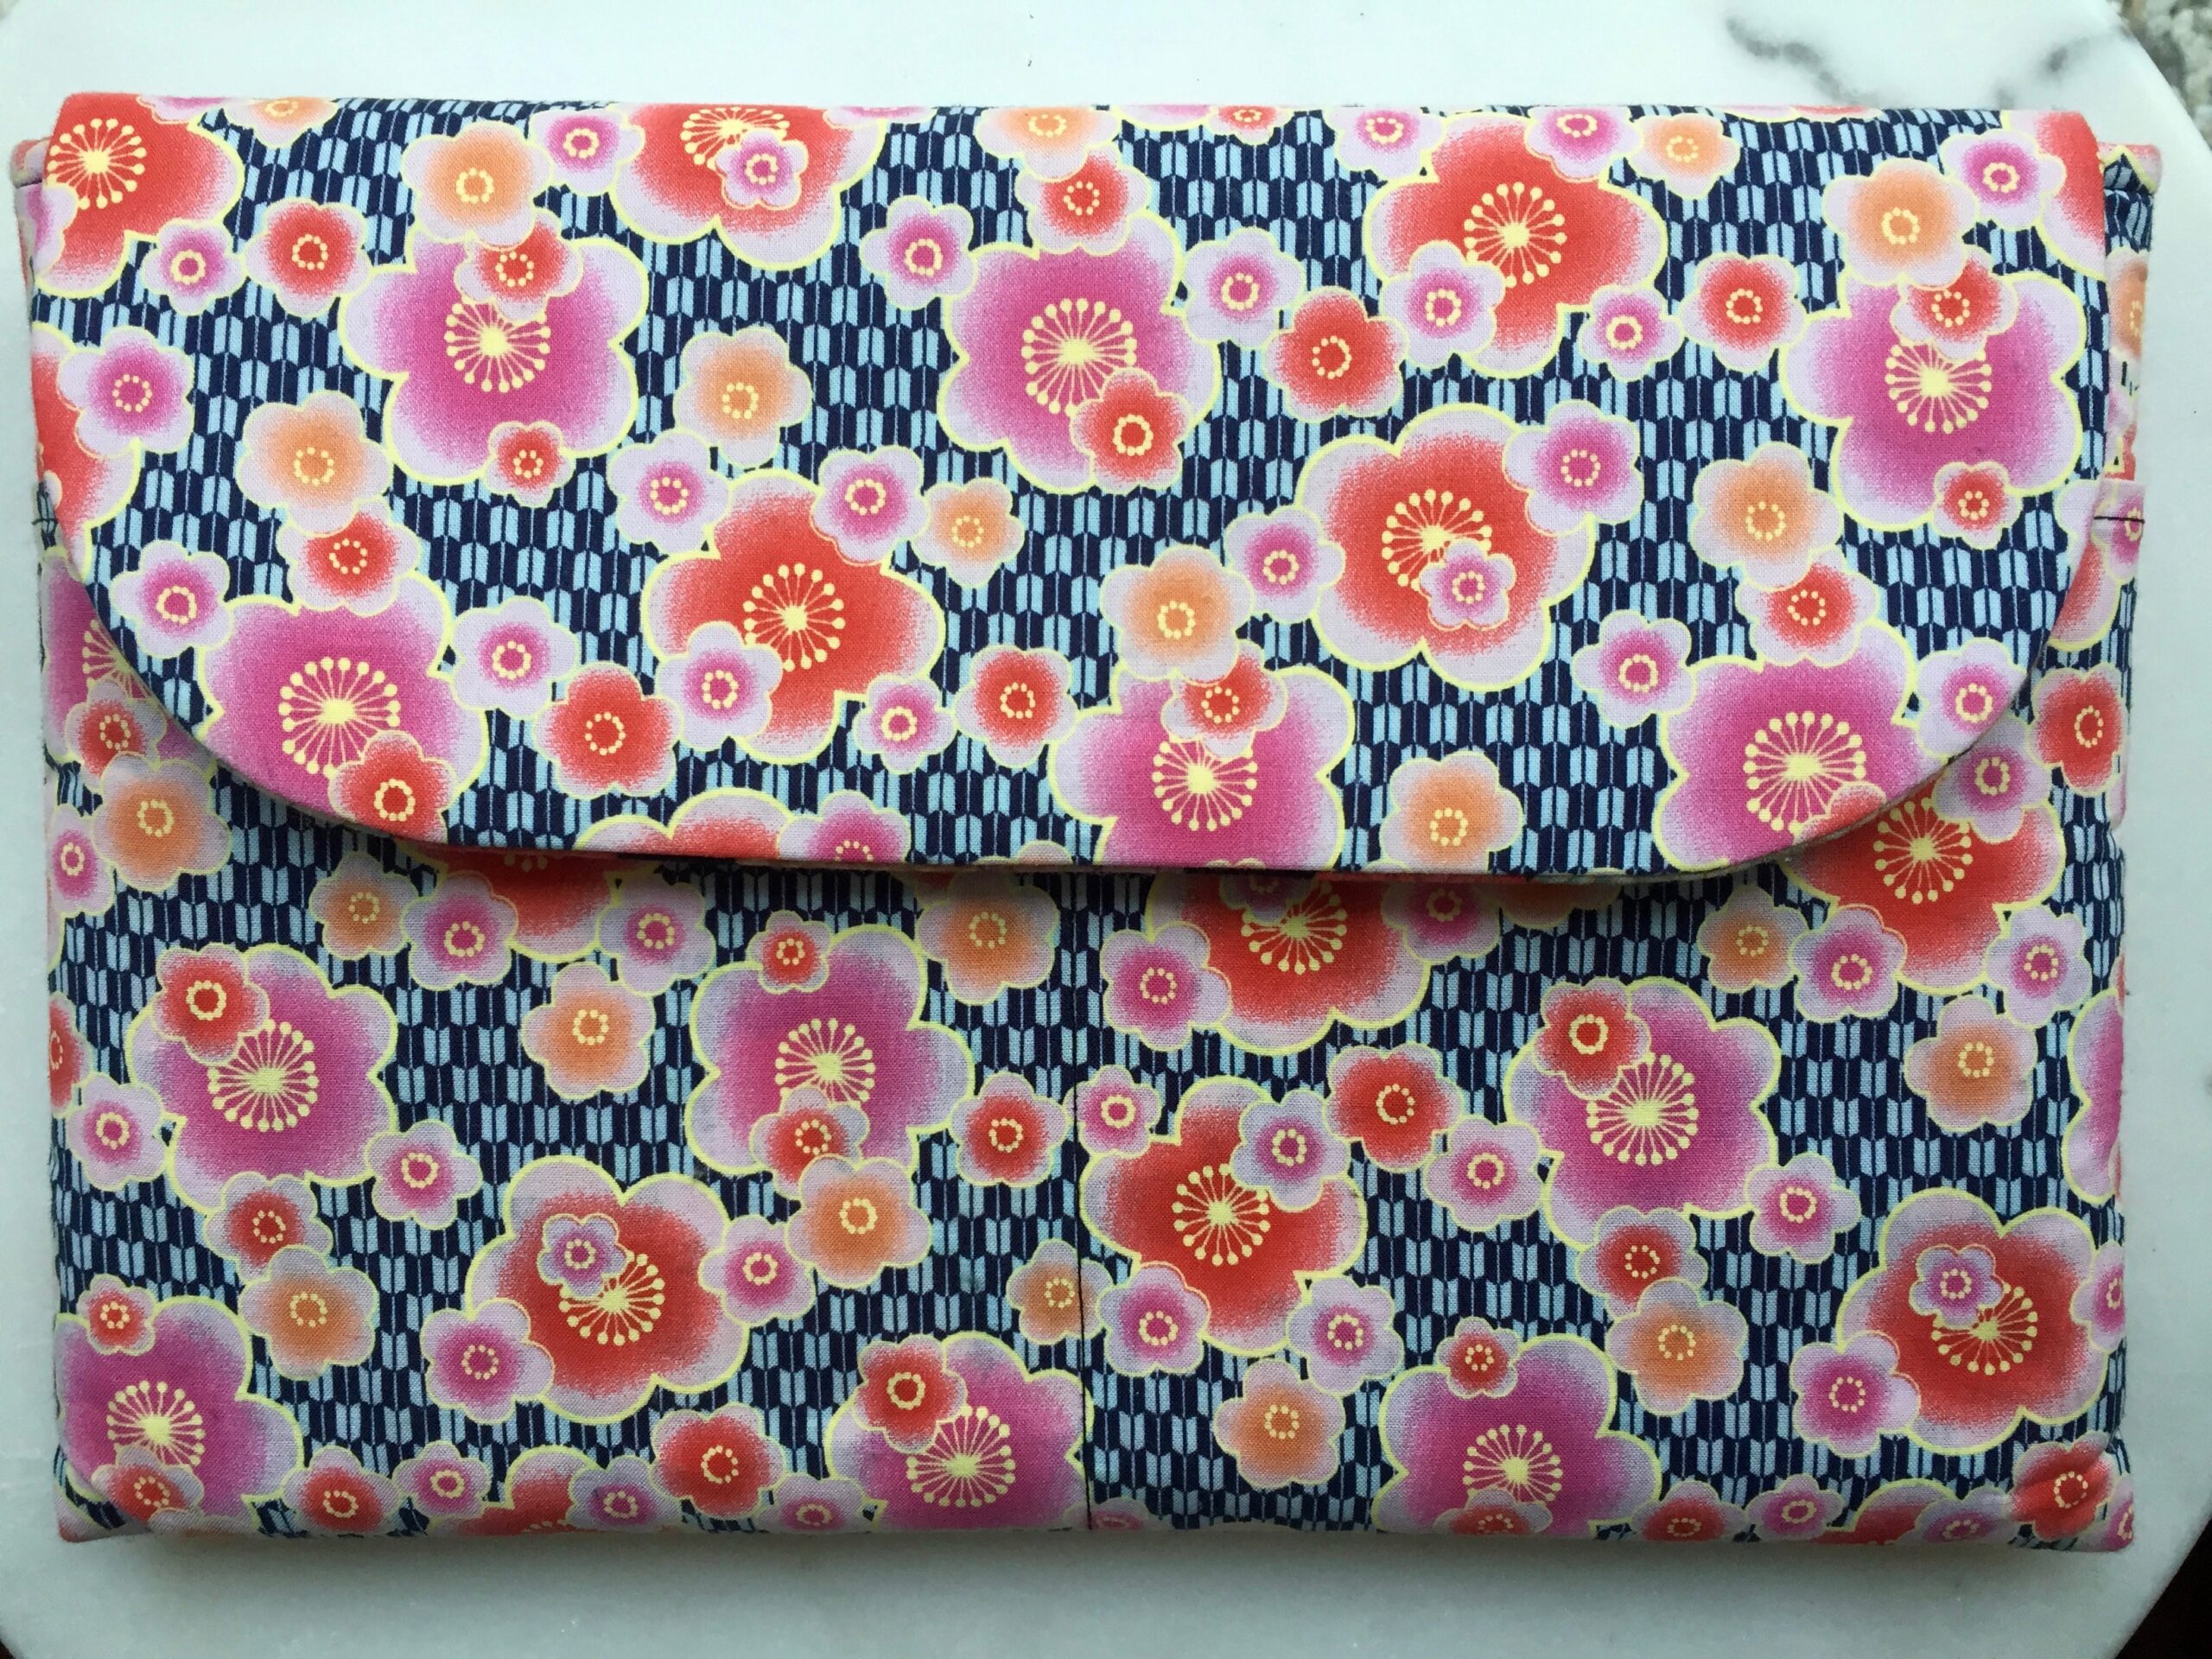
I searched for beautiful handmade and handprinted sheets of paper in different colors and designs I liked- I knew this meant every invite was going to be unique, and even if the person who ripped the envelope open didn’t notice, or couldn’t imagine the work and thought it took into that sliver of pink and gold, it made me ridiculously happy, because it was so beautiful and special. I wanted the paper to fit the theme of the invites, and the color family, but not be perfectly matched. See slideshow below for pics.
I made almost 100 envelope liners, and used about 10 large sheets of different kinds of paper.
[slider name=”diy-envelope-liners”]
What you’ll need:
paper sheets, ruler, scissors, pencil, eraser, glue sticks, 2 spare envelopes, paper towels
1. Select and buy paper sheets (they shouldn’t be too thick as you’ll have to fold them). For those near NYC, I bought mine at Pearl River Mart, A.I. Friedman, and Kate’s Paperie.
2. Create a large clean work area- a dining room table is perfect. Arrange your sheets, invites, envelopes etc. Line your workspace with clean tissue paper so you don’t smudge glue and pencil marks.
2. Take a couple of extra envelopes and open them up along the seam, being careful not to rip them.
3. Create 2 templates for the liners by using your ruler and a pencil to outline where you will cut it- you want about 1/2 an inch from the edges of the envelope. Keep the lines straight and even. Cut the ‘house’ shaped template with scissors carefully.
4. Turn paper sheets around to the side that’s unprinted, and trace the outline of the liner template. You want to use as much paper as possible, so line it up side by side as much as you can. Do one sheet first to get a feel for the whole process, then do the rest.
5. Cut the paper sheets along the outlines, and use the eraser to gently erase any visible pencil lines, so they don’t smudge the invites and envelopes.
6. Take a fresh envelope, line the paper liner face up inside the envelope, position it in the middle, and fold the top of the envelope over to create a crease in the liner.
7. Once you have a crease, use glue stick to cover only the top triangle section of the back of the liner, flip it over and place is securely along the crease of the envelope in the center. Use a clean paper towel to press down on the envelope and apply pressure to the glued liner area. Remember you do not glue the bottom part of the paper liner- just the top part above the crease.
8. Repeat until done!
9. Save paper scraps for next DIY project (bookmarks)!
TIP: If the template starts getting too worn from tracing the pencil along the edges, use the new template for the rest. You want to make sure the lines are straight. Use clean paper towels so you don’t smudge glue or pencil on the envelopes!